

DarrenWhite99
-
Posts
1302 -
Joined
-
Last visited
-
Days Won
251
Content Type
Forums
Store
Downloads
Events
Files posted by DarrenWhite99
-

RMM - Conflicting Programs or Services
By DarrenWhite99 in Internal Monitors
Having other RMM products installed on your managed endpoints can cause poor performance or system instability. They also represent a potential risk as an external party has remote access/control over the system and may bypass other security safeguards. Foreign RMM products should be fully removed to ensure they are not active.
This is often uncovered while onboarding a new client. If this alert is raised for an established client it may indicate another MSP is taking over or is preparing to take over. If remote access tools must be used by other vendors, see if you can provide the necessary functionality using your (managed) tools instead.
Once you import the monitor you will need to make some adjustments to the first line in the "Additional Condition" section.
SET @PreferredRMMList='Automate,Control'; Set this to a list of RMM tools that you deploy and that are expected to work together. The names will need to match the RMM names assigned in the monitor. Hit "Build and View Query" to see sample results and identify additional preferred product names.
SET @ReportPreferredRMM=False; Setting this to True will include preferred products in the alert message of the "Conflicting" applications. Since the alert is basically saying "These are what you should remove" you may not want preferred products mentioned.
SET @RequirePreferredRMMInstalled=False; Setting this to True will only alert on an endpoint where a preferred RMM product was found in addition to a non-preferred product. Setting to False will alert even when only multiple non-preferred products are found. (This is probably useless since you wouldn't have any inventory if Automate was not installed, but the logic was already there from a similar monitor)
The monitor will import as a global monitor that targets all agents. You may want to select some groups to target instead, such as groups for computers under a service plan. This way you won't alert on agents that are not expected to only have your RMM products installed. If you are using the standard Control/ScreenConnect integration, the monitor will already identify your unique ID and will alert when other instances are found.
If you need to add a new product, copy the format of existing products matched by software or service name.
Tweaks
Secondary ScreenConnect/Control instances
I included a couple of placeholder Control instances. If you have a second ScreenConnect instance you can identify it as something other than "UnknownControl". You will need to specify the instance ID in 4 places.
The software table - Known Control Software Definition:
Update `SELECT 'Company1Control', appid FROM software WHERE ((`Name` LIKE 'ScreenConnect Client%' OR `Name` LIKE 'connectwisecontrol-%') AND INSTR(`Name`,'1234567890123456')>0) UNION` to be named what you want and with your servers ID. The software table - Unknown Control Software Definition Exclusion:
Update the `SELECT 'UnknownControl'` row with a clause like ` AND INSTR(`Name`,'1234567890123456')=0 ` with your servers ID. The services table - Known Control Service Definition:
Update `SELECT 'Company1Control', NULL, ServiceId FROM services WHERE ((`Name` LIKE 'ScreenConnect Client%' OR `Name` LIKE 'connectwisecontrol-%') AND INSTR(`Name`,'1234567890123456')>0) UNION` to be named what you want and with your servers ID. The services table - Unknown Control Software Definition Exclusion:
Update the `SELECT 'UnknownControl'` row with a clause like ` AND INSTR(`Name`,'1234567890123456')=0 ` with your servers ID. Alternate Remote Access Tools
The presence of alternate RMM products is a reality. Some clients will have their own remote tools and so there is a way to define allowed clients on a tool by tool basis. This works by setting the @AlternateRMMList and @AlternateRMMClients variables.
SET @AlternateRMMList='Automox,Dameware,GoToAssist'; This value is a comma delimited list of RMM tools that you want to specify an override. The order is important because the @AlternateRMMClients values MUST be in the same order.
SET @AlternateRMMClients='Automox,1,2,3:DameWare:GoTo,1,2'; This value is a colon delimited list of comma delimited client IDs, and should have the same number of items as the first variable. Since the ClientID is being checked against the list for the tool in the same position as the @AlternateRMMList value, you can freely throw the tool name in as the first element of the client list for each tool. This helps keep the value organized and updateable as otherwise the list would be like SET @AlternateRMMClients='1,2,3::1,2';, etc.
Explaining the example above:
I have three products I want to define as alternate RMM tools for clients: Automox, Dameware, and GoToAssist. Automox is first, so I am matching the first group of items: "Automox,1,2,3", which would match clientid 1, 2, or 3. Dameware is second, so I am matching the second group of items: "DameWare". This won't match any clientids because none were specified GoToAssist is third in the list, so I am matching the third group of items, "GoTo,1,2", which would match clientid 1 or 2. This example also demonstrates how the tool name in the RMMClients value doesn't matter, it is just included to help identify where you would list the clientids for a given tool. Help Out
Help identify unknown RMM products by sharing the Product name and Software and Service names that indicate the product is installed. I can update the file periodically with new product definitions.
31 downloads
(0 reviews)0 comments
Submitted
-

AV - Conflicting Programs or Services
By DarrenWhite99 in Internal Monitors
A challenge when managing endpoints is identifying which computers still have legacy AV products present once you have your preferred AV installed. This monitor will match program and service inventories to known AV products and alert when multiple solutions are found. Once you import the monitor you will need to make some adjustments to the first line in the "Additional Condition" section.
SET @PreferredAVList='ProductName1,ProductName2'; Set this to a list of AV products that you deploy and that are expected to work together. The names will need to match the AV names assigned in the monitor. Hit "Build and View Query" to see sample results and identify your preferred AV product names. If you don't set this the monitor will just alert for every agent that has multiple products installed.
SET @ReportPreferredAV=False; Setting this to True will include preferred products in the alert message of the "Conflicting" applications. Since the alert is basically saying "These are what you should remove" you may not want preferred products mentioned.
SET @RequirePreferredAVInstalled=False; Setting this to True will only alert on an endpoint where a preferred AV product was found in addition to a non-preferred product. Setting to False will alert even when only multiple non-preferred products are found.
The monitor will import as a global monitor that targets all agents. You will want to select some groups to target instead, such as groups for computers under a service plan or groups for computers that should have a managed AV product deployed. This way you won't alert on agents that are not expected to have your preferred AV product installed.
If you need to add a new product, copy the format of existing products matched by program or service name.
Tweaks
If you want to alert when only 1 product is found but it is not a preferred product:
Change
HAVING COUNT(DISTINCT IF(FIND_IN_SET(innerdt.AVName,@PreferredAVList),'Preferred',innerdt.AVName))>1 To
HAVING COUNT(DISTINCT IF(FIND_IN_SET(innerdt.AVName,@PreferredAVList),NULL,innerdt.AVName))>=1 Help Out
Help identify unknown AV products by sharing the Product name and Software and Service names that indicate the product is installed. I can update the file periodically with new product definitions.
For Instance:
ESET - Application Names are like 'ESET Endpoint%' or 'ESET File%' or 'NOD32%'. Services have the Name 'ekrn' or 'ekrnEpfw'.
20 downloads
-

Generate Agent InstallerToken
By DarrenWhite99 in Scripts
This script is intended to be used as a function script, but is flexible and can be ran manually. The script generates a random InstallerToken value for the location and installer type requested, valid for a variable length of time. These can be used to create installer download links valid for more than 24 hours that can be given to clients, or used in deployment scripts. They can also be issued for shorter periods specifically for on-demand agent installation (such as reinstalling an Automate agent through Control). The expected use case is for scripted creation of batch (or powershell) agent deployment scripts that download the agent installer at run time. Another script can call this one to generate a token, and then write that token into the deployment script. This is an improvement over deployment solutions that require the server password to be stored as the installertoken can expire or be selectively revoked at any time with very little impact, but a server password reset impacts all installers for all clients.
1868 downloads
-

Reset Agent ID
By DarrenWhite99 in Troubleshooting
This script will force the CWAutomate Agent to re-register with the server, hopefully with a new ID. It does this by clearing the current MAC and ID values on the agent, which should cause the agent to be detected as new. This can be used when multiple agents are sharing the same ID. This script supports Windows, OSX, and Linux.
In the future, I plan to make a universal reset that issues the reset for all three OS types simultaneously, since the Agent OS detection is not reliable when two agents with different OSes are sharing the same ID. (Probably very rare) The reset commands used can also be pulled out and sent manually through a remote shell, or through the CWControl agent.
528 downloads
(0 reviews)0 comments
Updated
-

Script Backup
By DarrenWhite99 in Scripts
This solution will export customizations into a folder hierarchy based on each type of backup. It uses only Automate scripting functions so it is compatible with both Cloud Hosted and On-Prem servers. It is compatible with MySQL 5.6+ and Automate Version 11+.
Script Backups will be placed in folders matching the script folders in your environment. Each time a script is exported, the last updated time and user information is included, providing multiple script revisions as it is changed over time. This script does not decode the scriptdata, so script dependencies like EDF's or other scripts will not be bundled in the XML export. But if you are just looking to undo a change, the script dependencies should exist already. Scriptlets will not be "versioned", but it will detect when they have changed and will only back up new or changed Scriptlets.
Additionally, the following item types will also be backed up: Internal Monitors, Group Monitors, Remote Monitors, Dataviews, Role Detections, ExtraData Fields, and VirusScanners.
The backups will be created at the folder identified by "@BackupRoot@", which you can provide as a script parameter when scheduling if you do not want to use the default path. Target the script against an online agent, and the script data will be backed up to that computer. Future runs will reference the saved "Script State" variable for that agent and will only include the scripts updated since the last successful backup. Backup verification is performed, if a script backup file was not created as expected, the backup timestamp will not be changed allowing the backup to be attempted again.
The attached .zip bundle contains scripts actually backed up by this solution. Import the "Send Email" script first, and then import the "Backup" script. If there are any problems or you would rather import a script exported by Automate, the "Backup Automate Scripts (and More).xml" is included as well. You do not need to import all three files!
Just schedule this to run daily against any agent to establish your script archive.
script version revision archive backup
485 downloads
(3 reviews)0 comments
Updated
-
Automate Agent Licenses Available
By DarrenWhite99 in Internal Monitors
This monitor will compare the number of available licenses to the value in Result. This value will be customized based on the number of agents you are currently licensed for, but you can change the value to be warned earlier or later. The Identity field reports the available agent licenses in increments of 10. This means that the monitor identity will be "50" when between 41 and 50 licenses remain, and "40" when between 31 and 40 remain. In this way a unique alert will be triggered each time the available count is reduced by 10 (or more). If you do not want new alerts as the remaining count continues dropping below the threshold, set the identity field to "computers.computerid" (no quotes).
The Duplicate Alert Frequency is set to Once per 7 days. So after 1 week another alert would generate even if the available count did not change. Set to "Send Fail After Success" if you do not want any repeat notifications for the same "incident".
The Alert Template should default to the stock "Create Ticket" alert. I would suggest this be changed to an alert template that generates an email so that the notice can be sent directly to the person who manages agent licenses.
NOTE: The monitor is designed to alert against the Automate Server (where the "LTAgent" service is Running). If you don't have an agent on your Automate Server, the monitor falls back to Computer ID 1. If you don't have THAT agent the monitor won't work. To change the fallback computer ID, edit the Additional Condition and update "IFNULL(MAX(computerid),1)", replacing "1" with whatever computer you want to generate the alert against.
Install Instructions: Unzip the attached file, and import into Control Center using "Tools -> Import -> SQL File". The Internal Monitor name will be "CWAutomate Agent Licenses Available".
388 downloads
-

Manage RoleDetections that are no longer Detected
By DarrenWhite99 in Internal Monitors
Once a role has been detected for an agent, it will remain in the list of roles for that system even if the detection rule no longer applies. There are no timestamps recorded for role changes so it is impossible to know if the non-detection state is short term or permanent. This Internal Monitor named "Expire RoleDections Not Detected For 7 Days*" will identify inactive roles on an agent, which creates a separate active alert for each role on the agent with a timestamp for when the role was first found missing. The RAWSQL monitor is three queries in one. The first one checks for any role that was reported missing more than 7 days ago, and deletes the role from the agent (based on the alert timestamp). The second query deletes role alerts from the history if the role is found to be active, or no longer exists on that agent. The last query is what actually detects missing roles to generate alerts. With the expired roles and alerts removed from the agent by the first queries, the active alert in the monitor will clear (heal) for that role also.
The role must be continuously non-detected.. If it is ever found to be a detected role before 7 days has passed, the alert will clear (query #2) and the monitor will start the clock again the if the role becomes missing again. Manually assigned "Apply" and "Ignore" Roles are preserved, only automatically detected roles are candidates for cleanup.
If you want your roles to clear quicker, change the date adjustment in the first query from "-7 DAY" to whatever interval you believe is appropriate.
This monitor has been updated/improved since it was first released. The attached SQL should safely update any existing version of this monitor and it is recommended that you update even if you have this monitor in place and working as this specific configuration may not have ever been published before.
189 downloads
-

CUSTOM Bad Processes Detected Internal Monitor
By DarrenWhite99 in SQL Snippets
UPDATE - 20190411 - The stock "PROC - Bad Processes Detected" has been improved. I don't know specifically when, but when looking on an up to date system running 2019 Patch3, the results match this monitor's results. It now actually matches the exe name (not just the process name). I'll leave this post if someone would like this for an old system, but if your system is current this monitor will not improve the results and I would suggest staying with the stock monitor.
I got tired of the useless/wrong BAD PROCESS tickets created by the stock "PROC - Bad Processes Detected" monitor, such as the "Reg.hta" classification alerting when Reg.exe is found running.
This SQL will clone the stock monitor (Or update itself if you run it again) targeting the same computer groups, and using the same alert settings. (If you have removed the stock monitor it will still create the new one but it will not target any specific groups). This monitor has been adjusted to only match when the process executable matches the Bad Process Executable name. In a perfect world it would match based on the entire path, but the process classification table only holds the EXE name. Still, this should be much more accurate, much less noisy, and when you re-classify a process you are doing for the EXE name, not just the process title.
This SQL only creates/updates the new monitor, so don't forget to disable the alerts assigned to the stock monitor or you will get tickets from both of them.
87 downloads
(0 reviews)0 comments
Updated
-

Domain Computers without Automate Agent
By DarrenWhite99 in Internal Monitors
This RAWSQL monitor uses data from the Active Directory Plugin to check for active AD Computer Accounts with a Windows OS that have recent logon times, and that do not have an Automate Agent installed. This is helpful to identify computers that were joined to the domain without the proper procedure, or computers that your agent deployment has not succeeded in reaching. The alert will be targeted against a probe computer for each client, you will need to read the alert body (or subject) to find out the name of the computer without an agent. Because the alerting is "Probe" centric, be aware of the following:
If you enable group targeting, and your targeting excludes the probe computer for a client, no machines will be reported for that client.
If you have no probe at any location for a client, no machines will be reported for that client.
The alerts now are applied against the DC used for the AD information gathering, so it no longer generates alerts using probe agents.
If you Exclude or Ignore the "computer", you are really excluding the Probe AD Controller Computer, and if you do this no machines will be reported for that client.
There is no simple way to Whitelist machines that do not have an agent installed on purpose. You will just have to live with them being reported. To prevent a computer from triggering an alert if it should not have an agent, just update the computer description in Active Directory to have the word "Exclude". Examples: "Exclude From MSP Management" , "Excluded from Automate Agent deployment", etc.
To Import: In Control Center, open Tools -> Import -> SQL File. (System->General->Import->SQL File in Automate 12) Select the file, and you should be asked to import 2 statements. (Cancel if it tells you a different number). The Monitor will be named "Domain Computer Without Automate Agent", and it should run every 6 hours. If you already have this monitor, you can safely import and it will apply the updates to your existing monitor.
Keywords: active directory domain joined computer object account missing labtech automate agent machine monitor
562 downloads
-

ScriptletsPack
By DarrenWhite99 in Scriptlets
This bundle contains separate SQL imports to add the following Scriptlets:
Check If Agent Is Online - Just checks if the agent has a recent contact timestamp, and branches based on the result. Check Script Execution Delay Before Continuing - Define how much time can pass between a script's SCHEDULED start time and it's actual start. For example: Allow a script to run only within 4 hours of the time it was scheduled. Check Script Execution Window Before Continuing - Define a start time and end time. If the script begins running outside of this window it will exit. The time is compensated for the agents timezone and supports wrapping past midnight. (Start at 23:00 and End at 03:00 is understood as between 11:00PM and 3:00AM) Confirm Contract Status - Checks that an Agent is Under MSP Contract, and is not Excluded From MSP Contract. Example Loop - A simple loop (Like in the Scripting Lab) to execute a loop repeatedly until it reaches the specified limit. Example SQL Loop - A more complex loop that uses the SQL Get Dataset function to retrieve a recordset and loop through the results. Exit If Not Windows OS - Basic 2 line script starter to abort if the agent is not running a windows OS. Lookup Password Credentials - Allows you to retrieve the Title, Username, Password, URL, Notes, and ExpireDate for a password by providing the ID. Includes a query to find the "best" user matching a name ranked by location and expiration date, or use your own logic to choose the ID. Pause Script Until Remote Commands are Retrieved - A OS Neutral command that guarantees that the script will halt until the agent picks up the command and returns the result. Useful for pacing some operations that can fail if executed out of order. In times past, not all remote commands would pause the script. A "Create Folder" and a "Copy File" command could be scripted one after the other, but both could end up queued at the same time, and the agent might start the copy before the folder has been created. Also useful after executing an agent restart or service restart, ensures that the agent is checking in again. The Script Wait allows additional time to pass before continuing the script execution. Process Text One Line at a Time - Takes a variable with multiple lines of text (like output from a command) and loops over it one line at a time (like the SQL Loop does with rows). Run Temporary Batch or Shell Script - Largely replaced by the Execute Script function for Windows, but still useful for OSX/Linux. (And still works fine with Windows). This scriptlet generates a random filename, writes the script contents to the file, executes and then removes the script from the agent.
To import a scriptlet, just use the Tools->Import->SQL function in Control Center (Or load the file contents into a Query Editor in SQLYog). To use the "Run Temporary Batch or Shell Script" refer to the screenshots below showing how to edit for Windows or OSX/Linux use. (Or both in one script if you are supporting multiple OS types!) Windows Batch Script: OSX/Linux Shell Script:
608 downloads
(1 review)0 comments
Updated
-

CWA Agent Version Update Monitor
By DarrenWhite99 in Internal Monitors
This monitor identifies the current agent version for OSX, Linux and Windows Agents. Every 5 minutes the monitor checks for agents that are below the current version and issues the Agent Update command to a small batch of online agents. It will only issue the command once per day for any particular agent, and only if there are no pending/executing commands already in the queue for the agent. It will dynamically calculate the concurrency limit so that it can process all of your agents in about 12 hours time. This spreads the load out while quickly bringing all agents up to date as soon as possible. Commands from before the agent was restarted are ignored, so it can update right away after a reboot even if it already failed to update within the past 24 hours.
The monitor will only report verified update failures, so you can use this monitor to generate a ticket or to run your own update remediation script since you know the self-update has failed. Even though only a small number will be asked to update each time it runs, the monitor will report ALL online, out of date agents. You do not need to run a script or generate a ticket or do anything else, the monitor is issuing the update commands directly in SQL. If you don't generate a ticket, you should check the monitor periodically and see which agents are reported since they are failing to update and will need some sort of manual intervention.
This file has been specially prepared to be safe for importing in Control Center through Tools -> Import SQL. The monitor will be named "CWA AGENT - Needs Update". If you have imported a previous version of this monitor, most of your customization's (Monitor Name, Alert Template, Ticket/Report Category, etc.) will be preserved but the necessary changes will be made automatically. Unlike prior versions of this monitor, you can safely "Build and View" and it will not continue to add more update commands.. Pending/In Process update commands will reduce the concurrency limit so that it never overloads the system with too many update commands at once.
FAQ:
My agent is outdated but the monitor doesn't show it. Why?
These are the criteria for an update command to be issued. Until the monitor tries to update an agent, it will never report it as failing to update. If any of these conditions are not met, this is why you aren't seeing the agent update command:
Is the agent version out of date? Is the agent online? (lastcontact within past 15 minutes) Are there no commands currently pending or executing? Have no update commands been issued within the past day for the current version? Have fewer than LIMIT (a custom value dynamically adjusted for your environment) update commands already been issued and have not completed? After answering YES to all of these checks, the monitor will issue the command to update the agent. It will only permit up to LIMIT update commands to be pending/executing at once, so if you have a large number of agents to update it might be awhile (up to 12 hours) before any particular agent is asked to update. Once an agent has been asked to update, the following criteria determines if the agent will be reported as failed:
Has an update command been issued within the past day? Is the agent online? (lastcontact within past 15 minutes) Did the update command report failure? OR has the update command been executing/completed for over 2 hours? Is the agent version still out of date? After answering YES to all of these checks the monitor will report that the agent has failed to update.
Why won't my agent update?
This can be caused by many reasons.
Some common ones:
Insufficient Agent resources (low ram/disk space/available cpu) Another software install is in progress. The agent is pending a reboot. A file cannot properly extract from the update. (Check for ReadOnly attributes or invalid file/folder permissions for "%WINDIR%\Temp\_LTUpdate") A file is locked and cannot be replaced. (LTSvc.exe, LTTray.exe, etc. might fail to stop. A .DLL might be open or locked by AV or a third party program.) Nearly all of these are resolved with a reboot, so that is a good troubleshooting step after checking the file attributes/permissions.
What alternative methods are available to update my agent?
Look for this section to be expanded on in the future.
LTPoSh has an Update-LTService function. Calling this function through Control is a highly effective way to resolve update failures for Windows agents. LTPoSh (or other solutions) can be used to reinstall the agent using Control, PSExec, or any other method as your disposal. (I have used ESET Remote Administrator to execute an install command for example).
update outdated out of date updated current agent version automatic automated internal monitor rawsql
770 downloads
-

Schedule Script to Run After Restart
By DarrenWhite99 in Internal Monitors
This Internal Monitor allows you to schedule a script after the next restart of an agent. There is no official way to indicate this, so it works by looking for scripts with a distinct schedule. When you want a script to execute after a restart, simply schedule it to run 2 years from now. This monitor will report any scripts that are found waiting, and when the agent has restarted (and is online), any waiting scripts will be rescheduled to start immediately. No helper scripts or alert templates are needed with this solution. Because of the way the monitor works, even if the agent is in maintenance mode the script will still be scheduled right away after a restart. (If your script is not a "maintenance mode" type script it will still wait to start)
Thanks to @CTaylor for his original implementation at http://labtechconsulting.com/schedule-labtech-script-to-run-after-reboot/ which used a monitor+script solution.
103 downloads
(0 reviews)0 comments
Submitted
-

Sticky Tickets - Keeps tickets active until they are corrected
By DarrenWhite99 in Internal Monitors
This is the "Internal Monitor For Automatic Resets on Ticket Status" (IMFARTS)
The tickets themselves aren't sticky, this is a solution for designating specific monitors so that if the ticket is closed without the monitor healing, the alert will be reset and a new ticket will be created. This is specifically for the scenario that exists for Internal Monitors that are configured to "Send Fail After Success". These monitors are useful because they do not continuously generate tickets or ticket comments. But issues can be lost if the ticket is closed without the monitor actually healing. If a monitor alert must be ignored, the agent should be excluded from the monitor instead of just closing the ticket. I am not saying that this should apply to every monitor (sometimes you may accept just closing the ticket). But if you have a monitor that you want to insure is not ignored, this monitor this can help.
The monitor works by searching for open alerts and tickets that have been generated by the all monitors. Any alerts found where the ticket has been closed but the alert is still active will be returned as a result. You do not want to alert (create a ticket or other action) on the result of this monitor. The results are only there to show you what alerts are currently not being watched because there is an active alert with no active ticket. Based on this, you can decide which monitors you want to enforce.
For monitors that you have chosen to enforce, if they are found to have no active ticket the previous alert will be cleared, allowing the monitor to generate a new alert (and ticket) the next time that monitor is processed. This monitor determines which monitors are being watched by a keyword in the other monitor's definition.
To enforce a monitor (so that it's tickets will be re-opened), you need to include the string "ENABLEIMFARTS" in the Additional Condition field. A simple way to do this is to add " AND 'ENABLEIMFARTS'<>'IGNORED' " to the Additional Condition field. This will always evaluate to TRUE, so it will not change the existing monitor's logic. You could also use computers.name NOT LIKE 'ENABLEIMFARTS', etc.. As long as the string is in the Additional Conditions, the monitor will be watched. It can easily be incorporated for regular or RAWSQL monitors.
An example: A Drive Monitor is reporting that under 2GB of free space exists for the "C" drive on AgentX. A ticket is created, and the monitor is configured for "Send Fail After Success". A technician accidentally closes the ticket. This Monitor detects that there is an active alert for AgentX on the "C" drive, but all tickets from that alert have been closed. If the string 'ENABLEIMFARTS' is found in that monitor, the current alert for AgentX "C" drive will be cleared. When the Drive Monitor processes next and it still finds that AgentX has an issue with "C", because there are now no active alerts this is treated as a new alert and a new ticket will be created.
To use: Import the attached SQL. I have prepared it to be safe for import using SQLYog or Control Center, and if you had added it previously it will safely update your current monitor.
Revision History:
2017-09-09 20:00:00 - Version 1 Posted.
2017-10-18 06:00:00 - Version 2. Adds support for ignored alerts (so it ignores that the ticket may be closed) and greatly improves the matches by catching alert tickets with customized alert subjects.
2018-12-11 03:00:00 - Version 3! Indicates when it resets status in the Alert History for any monitor it is acting on.
82 downloads
-

DNS Forwarder Check
By DarrenWhite99 in Remote Monitors
This monitor is designed to check the health of your DNS Server Forwarders.
Copy "DNSForwarderCheck.vbs" to your LTShare\Transfer\Monitors\ folder. Import the SQL file in Control Center -> Tools -> Import -> SQL File.
This will create a group monitor on the "Windows DNS Servers" group under "Service Plans\Windows Servers\Server Roles\Windows Servers Core Services". The monitor action will be "Default - Raise Alert".
Here are a couple of examples of Servers with underperforming DNS Forwarders.
Once you identify issues, use a tool like GRC DNS Benchmark to identify what your best server choices are. https://www.grc.com/dns/benchmark.htm
266 downloads
-

Alert When Agent Is Online
By DarrenWhite99 in Internal Monitors
The Internal Monitor "Notify When Agent is Online" watches machines with the "Notify When Online" computer EDF configured. It will send an alert as soon as it finds that the agent is offline. (The offline notice is skipped if the agent was already offline when notifications were first enabled.) When the agent comes online again another alert email will be sent and the EDF will be reset.
This monitor can be used to notify when a lost computer comes online, or when that machine that is only online in the office every few weeks is back.
To enable notifications for an agent, you simply put your email address into the "Notify When Online" EDF. You can enter multiple addresses separated by ";". The contents of the agent's "Comments" will be included in the email also. (Helpful to remember why you wanted to be alerted, or what instructions should be followed after receiving the alert.)
When the agent returns online, the Network Inventory and System Info are refreshed. The recovery email will include the following details:
The last check in was at @AgentCheckIn@.
Public IP Detected: %RouterAddress%
Internal IP: %LocalAddress%
System Uptime: %uptime%
Last Logged in User: %lastuser%
This bundle includes a Script+EDF XML, and a SQL file with the Internal Monitor.
To import the Script and EDF, select Tools -> Import -> XML Expansion. After import the script should appear in the "\Autofix Actions" folder.
To import the Internal Monitor, select Tools -> Import -> SQL File. The monitor should be imported AFTER the script bundle has already been added.
After importing, verify that a valid Alert Template is selected for the monitor. The Alert Template MUST have the "Run Script" action enabled without any script specified in the template. (The script is set on the monitor)
Read the Script Notes for advanced control over the number of times a notification will be triggered.
1096 downloads
-

Automate Server Public IP Check
By DarrenWhite99 in Scripts
The IP for a Hosted Automate Server is not guaranteed to remain fixed, but if you do not include the IP in your Server Address template setting, your agents will not be able to communicate if DNS isn't working. See https://docs.connectwise.com/ConnectWise_Automate/ConnectWise_Automate_Knowledge_Base_Articles/Server%3A_Moving_to_a_New_FQDN for instructions on configuring alternate server addresses.
(Official Statement concerning Hosted Server IP Addresses - https://docs.connectwise.com/ConnectWise_Automate/ConnectWise_Automate_Knowledge_Base_Articles/Cloud%3A_Cloud_Server_IP_Address)
This script is a CLIENT script, which can be scheduled to run once or a few times each day. It will determine which probes are online and begin asking them to resolve the IP of your Automate server, and will continue asking agents until at least 5 agents have responded with the same IP. Once the IP has been determined, any templates that include an IP address but do not include the current IP will be flagged as needing an update. Because this solution is distributed and works without any LTServer commands it is suitable for use in Hosted and On-Premise environments.
After importing the script, you must set the hostname and email address for notifications inside the script. To schedule the script, go to Dashboard -> Management -> Scheduled Client Scripts and add the script with whatever schedule you like. Here is a suggested schedule:
42 downloads
(0 reviews)0 comments
Submitted
-
Active Directory Plugin Credential Status Monitor
By DarrenWhite99 in Internal Monitors
The AD Plugin will not operate properly if credentials are missing or are not valid. This monitor will report any Domain Controller Infrastructure Master that does not have valid credentials associated with it. This is the same information available in the plugin, but you can be automatically notified when there is a problem instead of having to check it manually.
The monitor is configured to only match agents with the "Domain Controller Infrastructure Master" role, so you can leave the targeting to all agents. If you only want to monitor systems that are under a service plan, you may choose to target a group such as: "Service Plans.Windows Servers.Server Roles.Windows Servers Core Services.Domain Controllers".
Thank You to @Jacobsa for the suggestion!
159 downloads
-

Trend Micro WFBS Services Removal
By DarrenWhite99 in Scripts
This is the script that I developed to manage removal of our Managed AV. It supports Windows and OSX installations. If it does not detect the product on the Agent it will skip removal attempts. It uses some known package GUIDS and can accept a removal password. It will leverage the Agent Removal script included with the Trend Micro Plugin for Automate if you have it. If the primary removal steps fail, it retrieves an uninstaller tool that Trend Micro released a few years ago (a copy is included in the bundle since they seem to have taken it down) to clean the system. Finally, it will try some batch/vbs script steps that I made to try and disable or cleanup the software manually. It supports a "ForcedRemoval" option that always triggers all the cleanup steps and skips testing if the product is installed.
150 downloads
(0 reviews)0 comments
Submitted
-

Remove Continuum Agent Software
By DarrenWhite99 in Scripts
This script will trigger removal for the following applications (in this order):
ITSupport247*Gateway
ITSupport247*MSMA
ITSupport247*DPMA
ITSupport247*
ITSPlatform
LogMeIn
This is just using a generic PowerShell script I made that searches for applications by name and then runs their uninstaller command. It has no specific knowledge of the applications.
If the command uses msiexec, it will make sure that the action is uninstall (/x) and it will ensure it runs silently. (adds /quiet /norestart, removes any other /q* parameter). If the command is anything else, it will just add the "/s" parameter if there is not already a parameter like "/s*" in the command.1095 downloads
-

Capture File into PS1 Script
By DarrenWhite99 in Automate PowerShell Code
This script takes a filename to capture as a parameter. The output is a PowerShell script capable of restoring the original file. The output will be no more than 70 characters wide and is Base64 encoded. The original filename and path is also Base64 encoded Unicode, so any valid file (even with international or Emoji characters) can be captured. The file timestamp is also captured and restored. This is meant as an alternative way to capture binary content that can be transmitted as plain text and used to easily re-create the file just by running a script. The capture and restore has been tested with PoSH2/Server2003 and Windows 10.
Example to Capture: powershell.exe -file captureportablefile.ps1 "c:\filetoretrieve.dat" > restorefile.ps1
The contents can also be placed in the "Execute Script" function with a filename specified as a parameter. (Include quotes around the path if it has spaces).
The output script will save the file with the original name\path, or it will accepts a filename parameter for the new file to save to. The output can be used directly in "Execute Script" to re-create the file, on a different agent for example. The script will indicate success or failure restoring the file.
Example to restore: powershell.exe -file restorefile.ps1
Example to restore to a different path: powershell.exe -file restorefile.ps1 "c:\newfiletosave.dat"
Here is en example of the script output. Running the script below will create a file named "C:\Windows\Temp\Have a ☺ day.zip"
$Base64FileName = @' QwA6AFwAVwBpAG4AZABvAHcAcwBcAFQAZQBtAHAAXABIAGEAdgBlACAAYQAgADomIABkAGEAeQA uAHoAaQBwAA== '@ $TimeStamp=[DateTime]636604097389163155 $Base64Contents = @' UEsDBAoAAAAAAP0Am0zn48F+HAAAABwAAAAZAAAASGF2ZSBhIGhhcHB5IGRheS1BTlNJLnR4dEp 1c3Qgc29tZSA/pD8/Pz8/Pz8gc3R1ZmYuDQpQSwMECgAAAAAA6QCbTORcBzs6AAAAOgAAABwAAA BIYXZlIGEgaGFwcHkgZGF5LVVuaWNvZGUudHh0//5KAHUAcwB0ACAAcwBvAG0AZQAgADomPCZrJ jsmQiZqJmAmYyZAJiAAcwB0AHUAZgBmAC4ADQAKAFBLAwQKAAAAAADxAJtMeDSP5jEAAAAxAAAA GQAAAEhhdmUgYSBoYXBweSBkYXktVVRGOC50eHTvu79KdXN0IHNvbWUg4pi64pi84pmr4pi74pm C4pmq4pmg4pmj4pmAIHN0dWZmLg0KUEsBAj8ACgAAAAAA/QCbTOfjwX4cAAAAHAAAABkAJAAAAA AAAAAgAAAAAAAAAEhhdmUgYSBoYXBweSBkYXktQU5TSS50eHQKACAAAAAAAAEAGACFbKN39t3TA UCsDnT23dMB8s/tc/bd0wFQSwECPwAKAAAAAADpAJtM5FwHOzoAAAA6AAAAHAAkAAAAAAAAACAA AABTAAAASGF2ZSBhIGhhcHB5IGRheS1Vbmljb2RlLnR4dAoAIAAAAAAAAQAYANODVGD23dMB0T1 GLPbd0wHRPUYs9t3TAVBLAQI/AAoAAAAAAPEAm0x4NI/mMQAAADEAAAAZACQAAAAAAAAAIAAAAM cAAABIYXZlIGEgaGFwcHkgZGF5LVVURjgudHh0CgAgAAAAAAABABgAYx1uafbd0wFjHW5p9t3TA YN/S2n23dMBUEsFBgAAAAADAAMARAEAAC8BAAAAAA== '@ $FileName=[System.Convert]::FromBase64String($Base64FileName) $FileName=[System.Text.Encoding]::Unicode.GetString($FileName) If(($Args) -ne $Null) { If($Args[0] -match '^[^\*\?]+$') {$FileName=$Args[0]} Else {Write-Output 'Invalid Filename.';break} } Try { $FileContents = [System.Convert]::FromBase64String($Base64Contents) $Null=Mkdir $(Split-Path -Path $FileName) -EA 0 Set-Content -Literal $FileName -Value $FileContents -Encoding Byte (Get-Item $($FileName)).LastWriteTimeUtc=$TimeStamp Write-Output "File restore complete: $($FileName)" } Catch {Write-Output "File restore failed: $($FileName)"}
23 downloads
(0 reviews)0 comments
Submitted
-
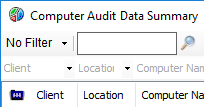
Computer Audit Dataview
By DarrenWhite99 in SQL Snippets
This Dataview incorporates some data from the Disk Inventory Dataview and the Computer Chassis Dataview, including Video Card, Memory, and CPU columns.. I created it when a client asked for assistance gathering this information. The first time we exported from multiple Dataviews and merged the columns in Excel. The next time they asked I made this so that 1 Dataview had all the columns that were important in this instance. Perhaps you would like these columns in a single Dataview also.
The SQL is safe to import through Control Center->Tools->Import SQL. The Dataview should be added into the Inventory folder.
359 downloads
-
Add Ticket ExternalID to Dataviews
By DarrenWhite99 in SQL Snippets
The attached SQL will modify all dataviews that include a ticketid to also include the external ticketid as "Ticket External ID". I suggest copying one or a few of the stock Dataviews, and then running this. While it will update all dataviews with ticket information, many will be flagged as having changes the next time Solution Center is ran and may be reset to original. The copied Dataviews should preserve the additional column.
Save the file and import into Control Center using Tools -> Import -> SQL File. It will ask if you want to "Import 1 Statement into the database". If it says there are many statements choose "No", you have an older (buggy) Control Center and you will need to import using SQLYog or some other tool.
Keywords: remote monitor free drive drives disk disks volume volumes mounted mount point no letter space percent percentage
29 downloads
-
Free Drive Space Monitor for Mounted Volumes
By DarrenWhite99 in Remote Monitors
On Windows Agents, LabTech assumes that all volumes have a drive letter associated with them. Volumes mounted to a path (CSV volumes, etc.) are not reported in the drive listing. This is a solution that uses a Remote EXE Monitor to dynamically detect mounted volumes and alert if the free space is below a configurable value.
The batch file is a powershell wrapper that queries for mounted volumes with no drive letter and returns a list of all volumes with less that 10 percent free space. The free space level can be passed as a parameter, so it is easy to monitor for 20%, 5%, etc. All volumes have the same threshold however, there is no support for different thresholds on different volumes. The powershell section could also be extracted and used directly.
On systems with no matching volumes, the result "No Mounted Volumes detected." is returned. If there are mounted volumes with no drive letter, the output will either be "All Mounted Volumes have above $FreeThreshold% space free.", or "Mounted Volumes at or below $FreeThreshold% free space:" with a list of all volumes that met the criteria.
This was implemented as a remote EXE monitor. SQL is included to import the monitor definition to an agent (configured for agent ID 1). See the MountedVolumesFreeSpaceMonitor-README.txt file in the attachment for more details. After importing, the Ticket and Report Category and Alert Template should be verified or assigned to valid values.
The monitor command is 'MountedVolumeDiskCheck.bat 10', where 10 represents the free space alert threshold. You can change threshold this globally if assigned to a group, or override the monitor on a per-agent basis to use a different threshold.
After importing and testing this monitor on an agent, the monitor can be added to an appropriate group so that Windows Servers will be monitored automatically.
See "Configuring Remote Monitors" in the documentation:
https://docs.connectwise.com/ConnectWise_Automate/ConnectWise_Automate_Documentation/070/160/040/020
Keywords: remote monitor free drive drives disk disks volume volumes mounted mount point no letter space percent percentage
140 downloads
(0 reviews)0 comments
Updated
-
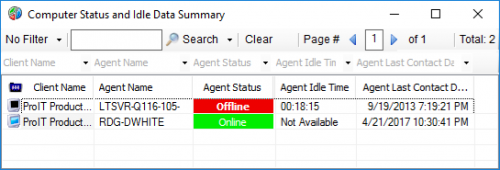
Agent Status and User Idle Time Dataview
By DarrenWhite99 in SQL Snippets
This Dataview is basically the same as the "Computer Status" Dataview, but I have added a column for Agent Idle Time. I find it helpful when I need to see quickly which users are on their systems, and which machines are not being used or have long idle times so that I can work without disrupting an active user. I have added another column, `Agent Additional Users`. This shows any other logins reported by Automate, such as on a Terminal Server. For only a couple of columns difference, I have found it to be a very useful dataview and refer to it often.
To import, just extract the .sql file from the zip. In Control Center select Tools->Import->SQL File. It will ask if you want to import 3 statements. This is normal.
When finished, select Tools->Reload Cache.
422 downloads
-
Verify and Manage Workstation Admin Credentials
By DarrenWhite99 in Scripts
This is a script to test and create or reset the Cache/Location Drive user account credentials and Location Admin credentials. If the credentials are domain based (domain\username, username) they will be tested but will not be reset. If the cacheuser is defined, cannot be validated, and is a local account (.\username) it will be created if missing and the password will be reset. After testing the cache user credentials, the Location Admin will be tested. If it cannot be validated and if it is a local account it will be created if missing, the password will be reset and it will be added to the local Administrators group. The password is always set not to expire if it is being reset.
This script relies on the correct Location configuration of the "Login for Administrator Access" the under the "Deployment and Defaults" tab to obtain the Admin credentials. The Cache User credentials are specified by the Location Drive settings on the General tab for the Location.
520 downloads
(0 reviews)0 comments
Submitted